Deployment
The Deployment section allows you to integrate your trained AI assistant into your application seamlessly. In this section, you can generate API keys to enable secure access to your assistant. You can also see what your users are asking in the Chats tab.
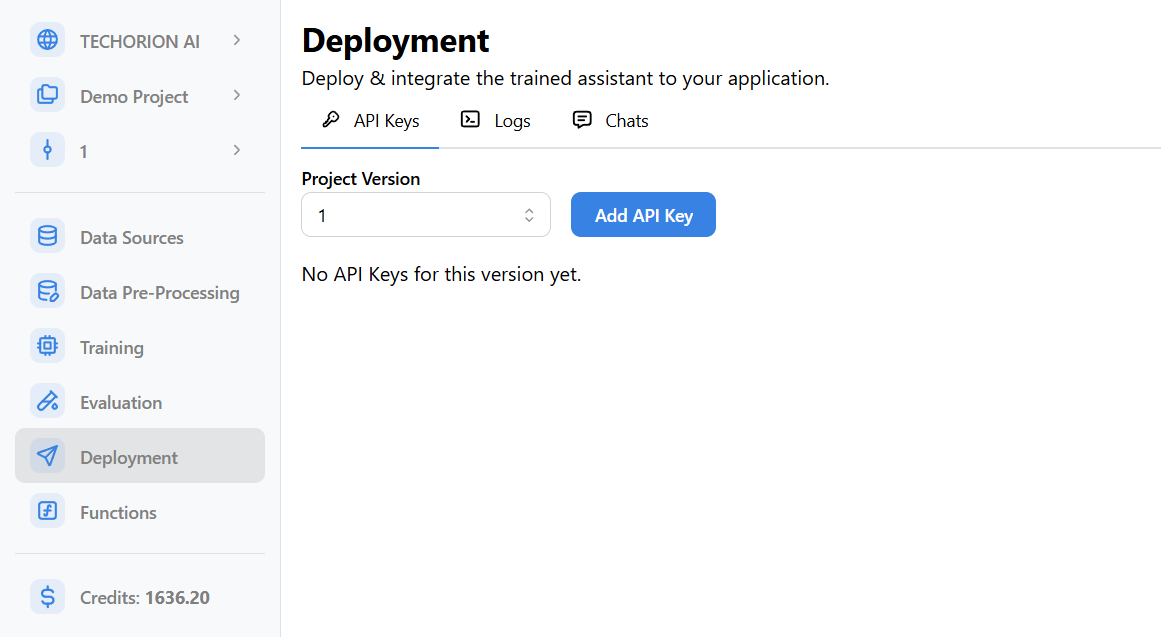
API Keys
API keys are unique tokens that connect your application to a specific trained model. They ensure secure and controlled access to the assistant’s capabilities.
Create an API Key
To create an API key, follow these steps:
-
Go to the Deployment section in the navigation panel.
-
Navigate to the API Keys tab. This tab displays all API keys for the selected version of your project.
-
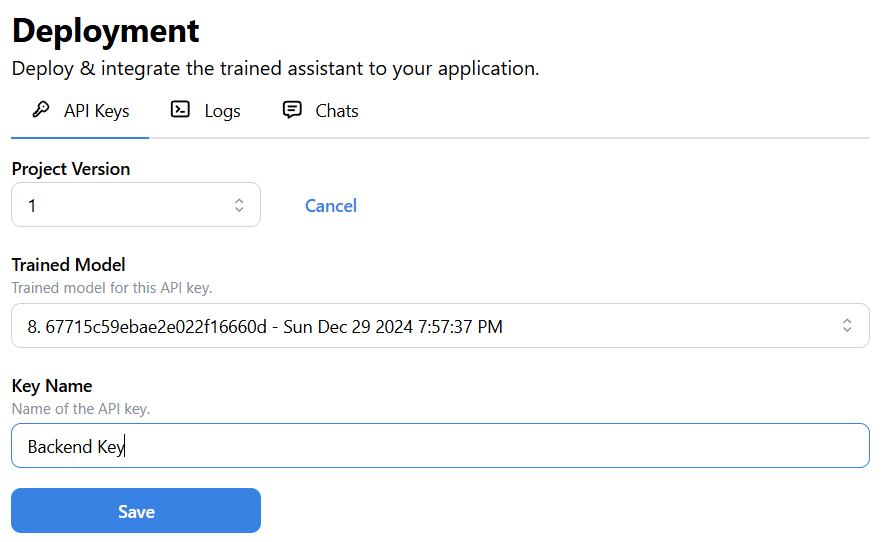
Click on the Add API Key button. A form will appear.
-
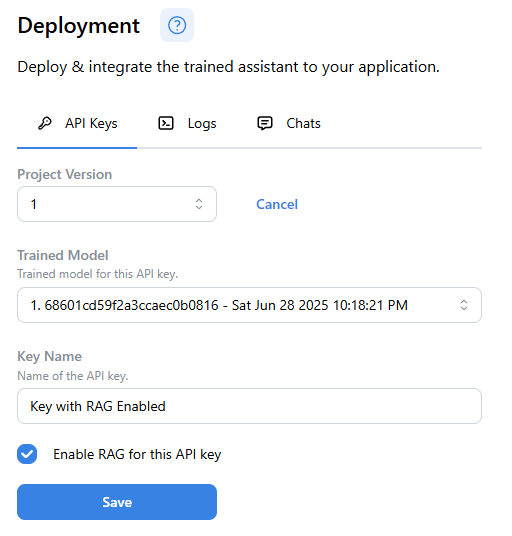
Select the model you want to associate the API key with.
-
Enter a name for the API key.
-
If RAG is enabled for your project version, you will also see an option to enable RAG for this API key. You can also enable or disable RAG for your API key later.
-
Click Save. You’ll see a success message confirming the API key creation.

-
The new API key will be added to the list. To copy the key, click on the Copy button next to the key.
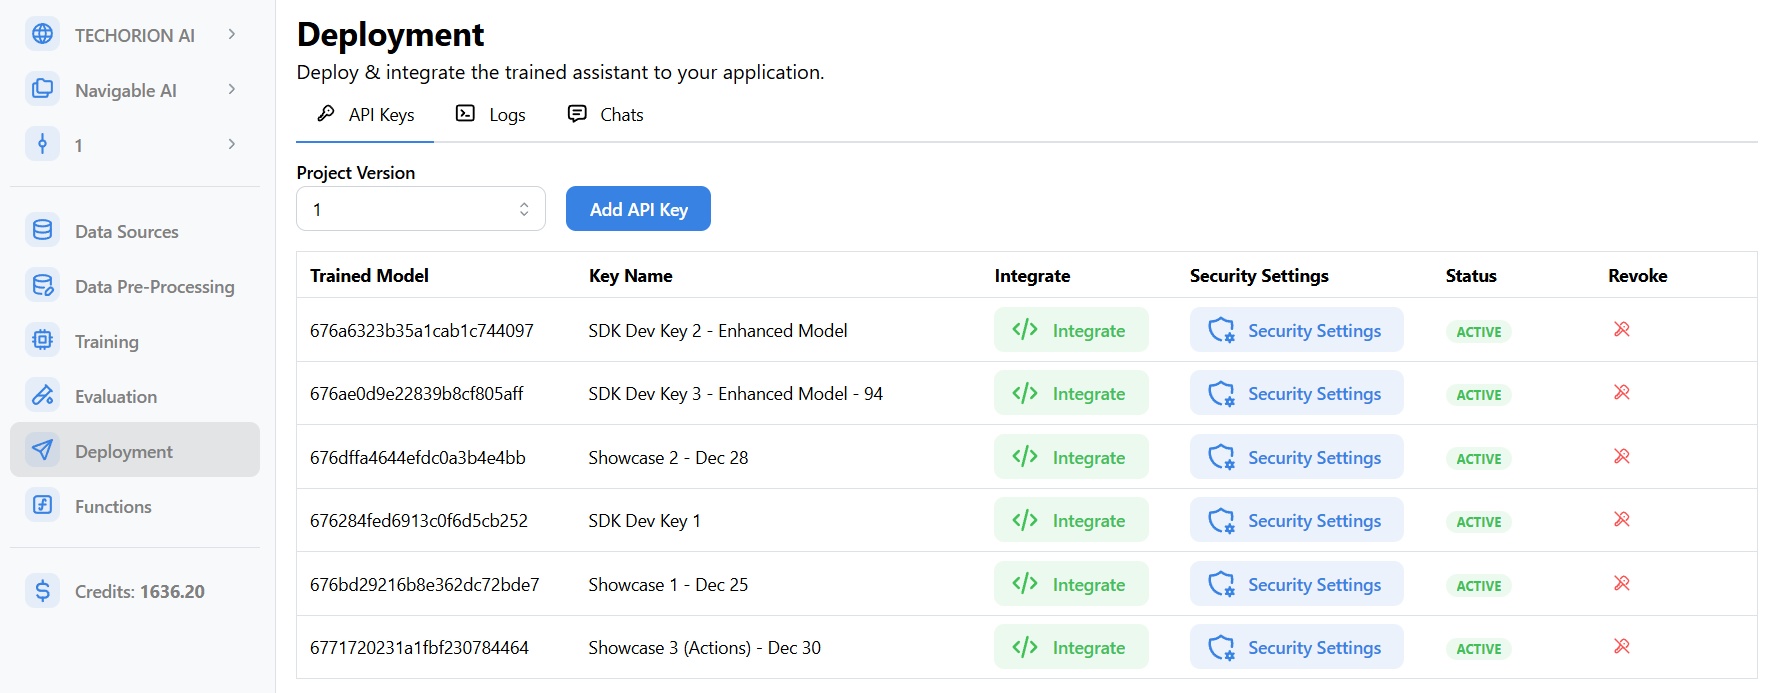
Revoke an API Key
If you no longer need an API key, you can revoke it to disable access. Revoked keys cannot be used to access the model.
- Click on the Revoke button next to the API key you want to revoke.
- Confirm the action in the modal that appears.
Once revoked, the key will be disabled and removed from the active keys list.
Integrating the Assistant
Once you've created an API key, you can integrate the assistant into your application in one of the following ways:
- Using Embed Code: The easiest option to integrate the model into your website using our Chat SDK.
- API: Use the generated API key to make API calls to access the assistant's capabilities.
Embed
To embed the assistant into your website, follow these steps:
-
Click on the Integrate button for the API key you want to use. The Embed tab will open by default.
infoYou can choose to integrate actions and functions now, or leave them for later.
-
Follow the steps as mentioned. You will need to add the CSS to the
<head>section of your HTML file. The JS code should be added to the end of the<body>section. -
This code needs to be added to every page where you want to use the assistant.
tipAdd the custom JS code to a separate file and include it in all the pages where you want to use the assistant.
Save your code and reload the webpage. You should see the chat widget appear on the page. When you click on it, you can start a conversation with the assistant.
For customizing the chat widget, refer to the Chat SDK documentation.
API Key
-
Click on the Integrate button for the API key you want to use.
-
Switch to the API Key tab.
-
Copy the API key and use it in your application.
tipFor security reasons, we recommend storing the API key using an environment variable and not directly embedding it in your frontend code.
Integrating Actions
Actions (Navigation Actions) enable you to add additional navigation capabilities to your assistant.
How do Navigation Actions Work?
Navigation Actions are a combination of actions and pages (Go to <page name>), that provide suggestions to the user on where to go to do what they want.
Navigation Actions can only be suggested if you have trained the assistant with pages or actions.
When the Assistant suggests a Navigation Action, your website/app should redirect the user to the page/screen, when the user clicks on the suggested action.
Writing the code for this will take time, but our Chat SDK has simplified this process.
All you need to do is provide a key-value pair for each Navigation Action, where the value is a path (string) or a function that will run when the user clicks on the suggestion button.
Use the actions map provided in the Actions tab of the API Key Integration Modal to get the list of functions along with their correct signatures.
const actions = {
   "logout": function () {
      // call your logout function
   }
   "login": "/login"
}
For string values, by default the redirect will be done using the window.location.href method. This can be changed by overriding the goTo (path: string) => void method after instantiating the NavigableAI object.
Read the Chat SDK documentation for more details.
Navigation Actions do not support dynamic routes.
For example, if the route has an ID that is dynamic /items/:id, you should instead provide a function that will let your user either:
-
Choose an ID from a dropdown, that then redirects the user
OR
-
Select an ID from an existing list page
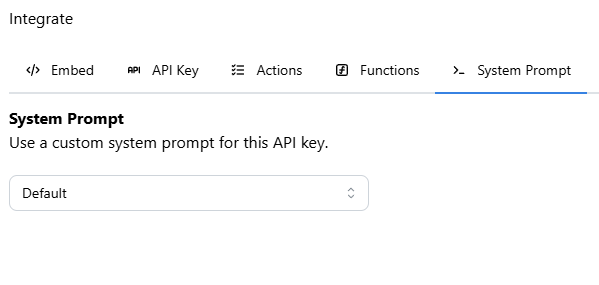
Using a Custom System Prompt
You can use a custom system prompt to give the assistant additional instructions. Custom system prompts can be added in the System Prompts section.
-
Navigate to the Deployment section.
-
Find the API key you want to use with a custom system prompt.
-
Click on the Integrate button.
-
Switch to the System Prompt tab.
-
Choose the system prompt from the dropdown.
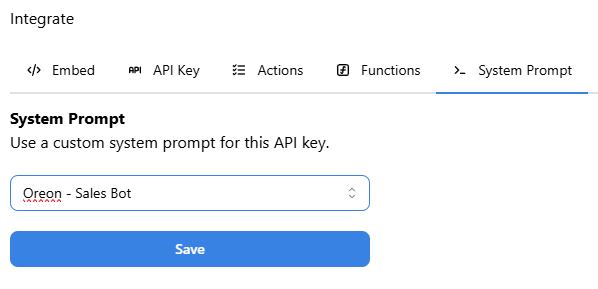
-
Click on the Save button.
From now, any API keys or embed codes that use this API key will use the selected system prompt.
Logs
The Logs tab allows you to monitor and debug the API usage. You can view logs for successful Chat API requests at the model level.
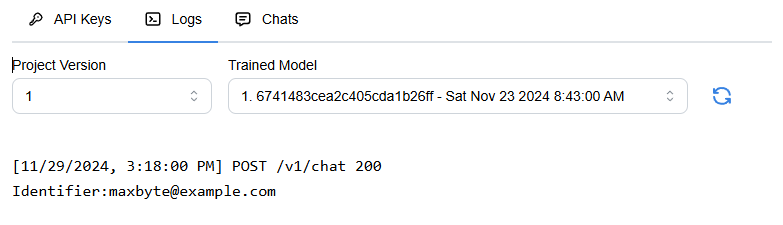
Use the Refresh button to fetch the latest logs.
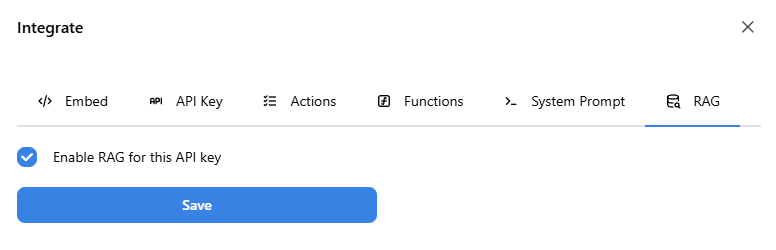
Enable or Disable RAG for an API Key
If RAG is enabled for your project version, you can enable or disable RAG for specific API keys.
-
Navigate to the Deployment section.
-
Find the API key you want to enable or disable RAG for.
-
Click on the Integrate button.
-
Switch to the RAG tab.
-
Check or uncheck the Enable RAG checkbox. To enable RAG, the checkbox must be checked. To disable RAG, the checkbox must be unchecked.
-
Click on the Save button.
Chats
The Chats tab provides an overview of user chat sessions at the model level. You can review individual messages exchanged between users and the assistant for troubleshooting or performance evaluation.
- Session Review: Gain insights into what your users are asking. Understand the context of interactions and analyze how the assistant responded.
- Filter by ID: Locate specific user sessions by filtering with their unique identifier (that you provide via the API)
This feature helps refine the assistant's behavior and ensures a seamless user experience.
With the tools in the Deployment section, you can securely deploy your assistant, monitor its performance, and continuously improve its interaction quality.
What’s Next?
Once you've created your API keys and set up logging for your assistant's interactions, the next steps involve integrating the API into your application. Here's what to do next:
-
Integrate API into Your Application: Embed the chat widget or use the generated API keys to make API calls and integrate the assistant's capabilities into your application. Refer to the API Documentation for detailed instructions on how to set up and use the API in your environment.
-
Monitor API Usage: Keep track of API requests and user interactions through the Logs and Chats tabs. Regularly monitor these to ensure smooth operation and to troubleshoot any issues that arise.
-
Optimize Your Model: Based on the feedback from the chat sessions, refine and retrain your model in the Training section to improve the assistant's performance.
-
Scale Your Usage: As your application grows, consider scaling your usage by upgrading your subscription plan to meet your growing needs. Add-On Chat messages can be purchased in the Billing section.
By following these next steps, you’ll be able to integrate, monitor, and improve your AI assistant in your application seamlessly.