Functions
Automate actions for your users with functions. Convert your AI Assistant into an AI Agent that can perform tasks on behalf of your users.

How do Functions Work?
To understand how functions work, let's take a look at a simple example. Assume you have a support form that your users can use to contact your team. You want to allow them to fill out and submit a ticket, but only using the chat interface of your AI Assistant. Here's what that flow would look like:
- The user tells the assistant that they want to contact support.
- The assistant prompts the user to provide the details required for the ticket. For example: Please provide a description of the issue you are facing and your email address.
- The user provides the required information.
- The assistant processes the information, creates a ticket and responds to the user.
Functions enable you to do exactly this. You can define functions that you already have in your existing codebase and automate them via the Assistant. Simply create a definition for the function you want to automate and the Assistant will handle the rest.
How did that work?
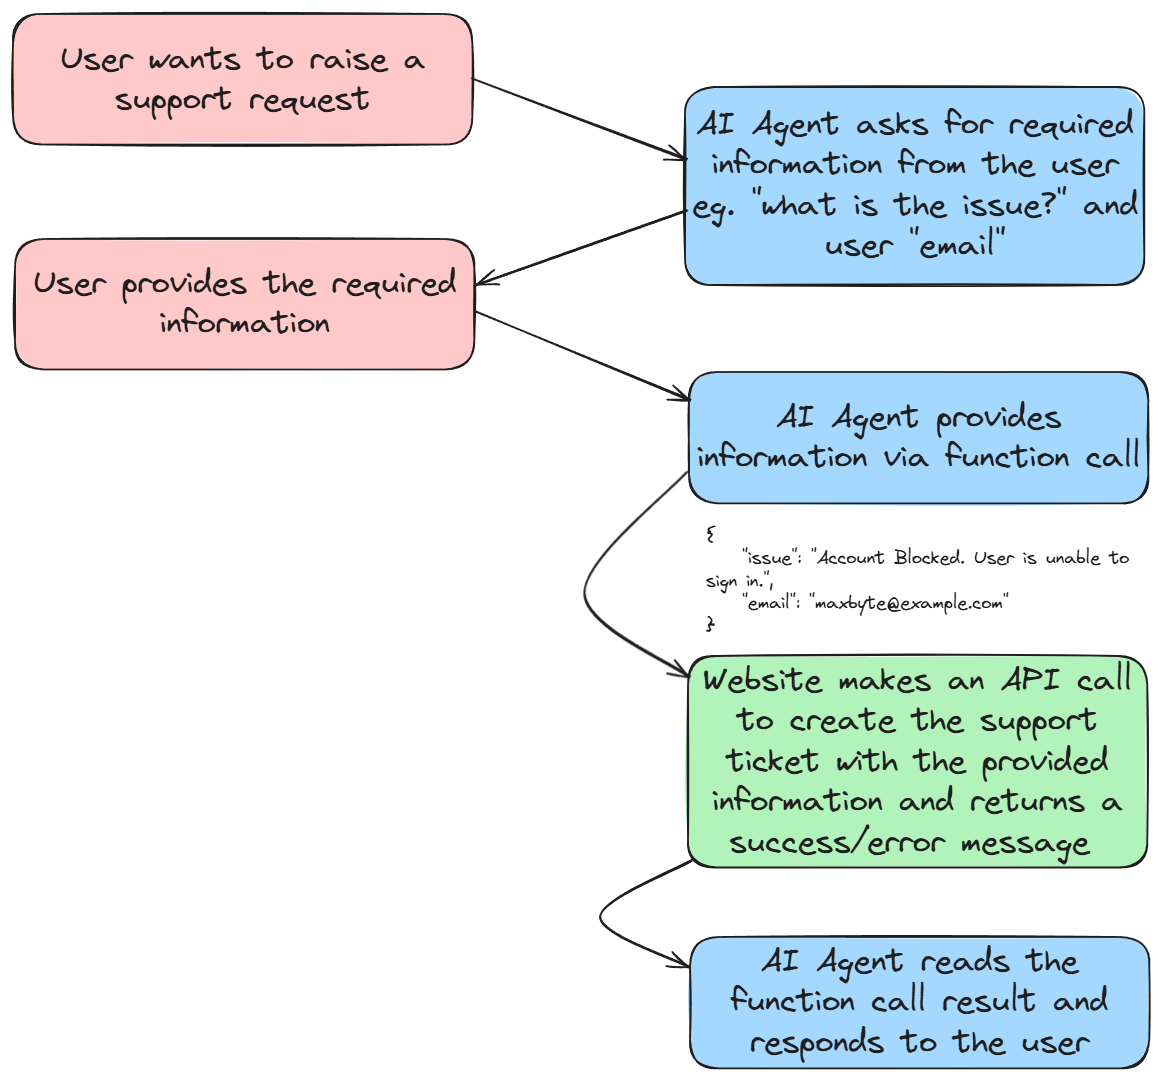
Let's break down the steps that happened in the background:
-
The user tells the assistant that they want to contact support.
-
The assistant prompts the user to provide the details required to run the
raise_a_support_ticketfunction. In this case, the function expects the user to provide a description of the issue and their email address. -
The user provides the required information.
-
The assistant processes the information and calls the
raise_a_support_ticketfunction, providing the user's email address and issue description as parameters.{
"issue": "<the description of the issue>",
"email": "<the user's email address>"
} -
Your website makes an API call with the provided parameters to your backend, which then creates a ticket and returns a response
-
This response is sent back to the Assistant, which then responds to the user.
Use descriptive responses along with the return value of the function to allow the Assistant to provide a more apt response to the user.
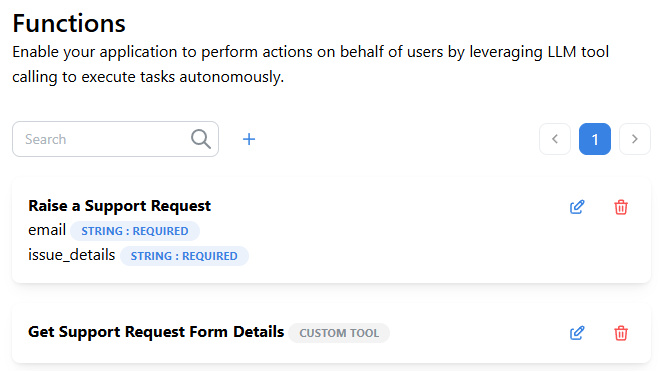
Add a Function
-
Go to the Functions section in the navigation panel.
-
Click on the Plus button to the right of the search bar to add a new function.

-
From the dropdown, select the related action for the function you want to automate. If you haven't added an action for it, you can add it via the Actions section.
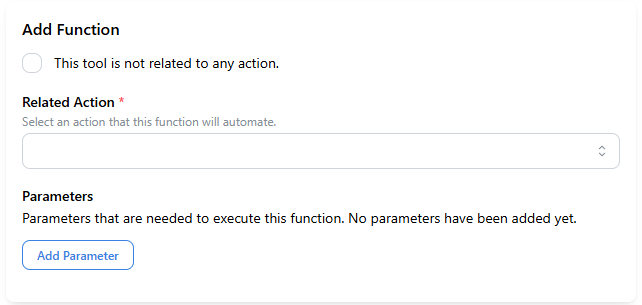
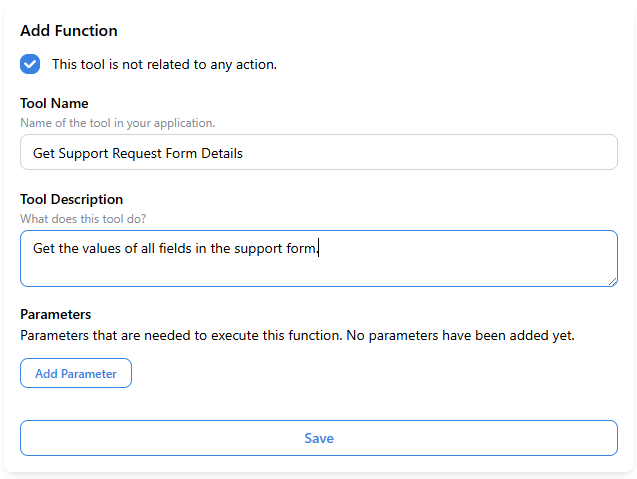
Alternatively, if you want to add a tool that's not related to any function, you can add it as a custom function. Simply click on the checkbox that says "This tool is not related to any action.". This will let you create a custom tool with a name and description instead of using a related action.
-
Optionally, you can add parameters for the function. Parameters are the data needed to execute the function. The Assistant will collect the parameters from the user and pass them to the function.
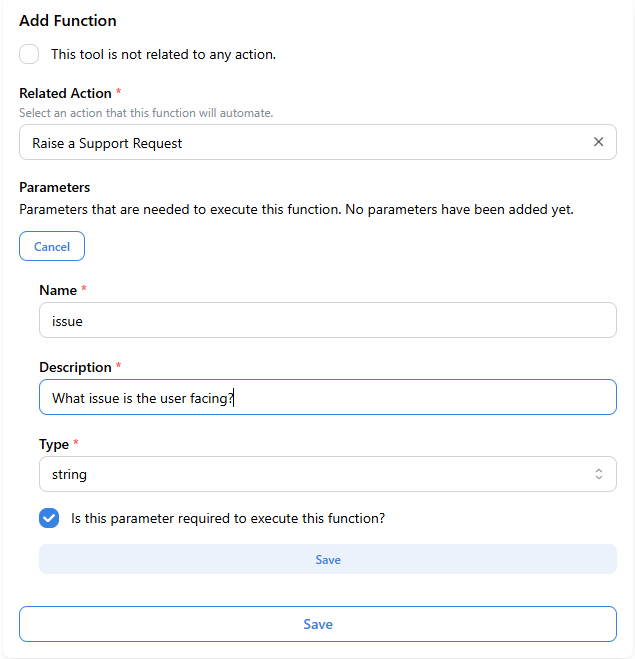
Parameters have the following format:
- Name: The name of the parameter.
- Description: A description of what the parameter is for. Provide a detailed description to allow the Assistant to understand the purpose of the parameter.
- Type: The data type of the parameter. Use the dropdown to select the appropriate data type. Currently supported types are:
string,numberandboolean. - Required: A checkbox to indicate whether the parameter is required or not.
If you don't have any parameters, consider using an action instead. Add an action and add the required logic to the action handler. This will allow the Assistant to handle the function automatically (if you don't need to collect any parameters).
-
Click Save. You’ll see a success message confirming the function creation.
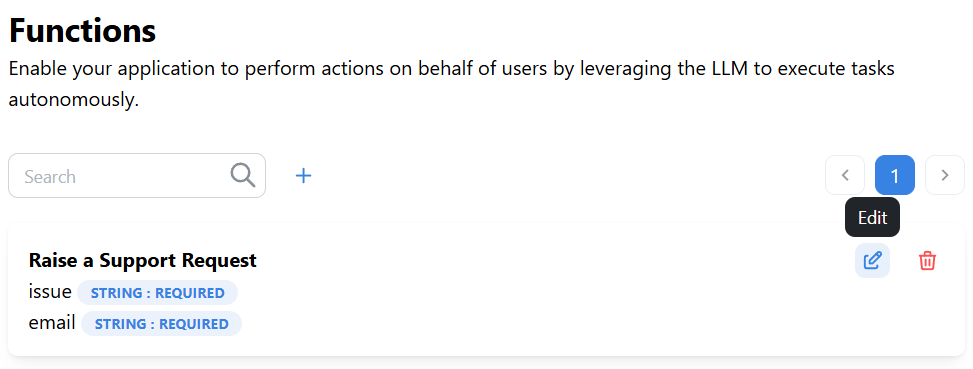
Edit a Function
-
Go to the Functions section in the navigation panel.
-
Locate the function you want to edit.
-
Click on the Pencil icon on the top-right of the function.
-
Make the necessary changes to the function.
-
Click Save. You’ll see a success message confirming the function update.
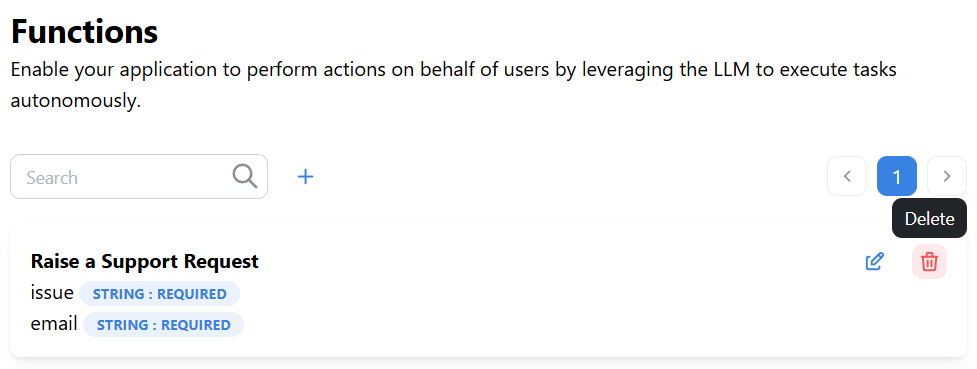
Delete a Function
-
Go to the Functions section in the navigation panel.
-
Locate the function you want to delete.
-
Click on the Trash icon on the top-right of the function.
-
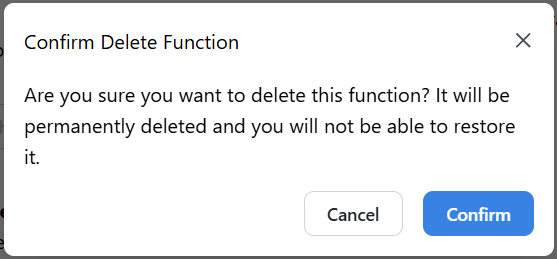
Click Delete. You’ll see a modal to confirm the deletion.
-
Click Confirm. You’ll see a success message confirming the function deletion.
How to integrate Functions?
Functions can be used with actions that the model is not trained on. However, it is recommended to use only with actions that the model is trained on.
Just like Actions, functions need to be provided via a key-value pair, where the key is the function name and the value is a function handler.
const functions = {
  raise_a_support_request: function ({ issue, email }) {
    // Your function logic here
    if(/* success */) {
       return "Ticket created successfully";
    }else{
       return "Ticket creation failed";
    }
  },
};
Use the functions map provided in the Functions tab of the API Key Integration Modal to get the list of functions along with their correct signatures.
The return value of the function should be the status of the function execution. If the function is successful, return success, else return error. You can also return detailed success messages, this will be used by the assistant to provide more context to the user.